Background
After moving to a small apartment and being boatless for a while, I was starting to get the urge to get out on the water again. So: I needed a small, portable, easy to store boat to explore the many interesting waterways in my area. Oh, and it had to be built inside my apartment! A folding boat seemed like the perfect solution.
The design
The starting point for my design process was the “one sheet punt” by flomo, one of the undisputed masters of one sheet boat design. Another inspiration was the prism by Hannu, the old school masters of one sheet boats. I also really liked the concept of the fold up kayak by Ken Simpson, especially the super minimal construction and tape hinges. A good way to prototype.
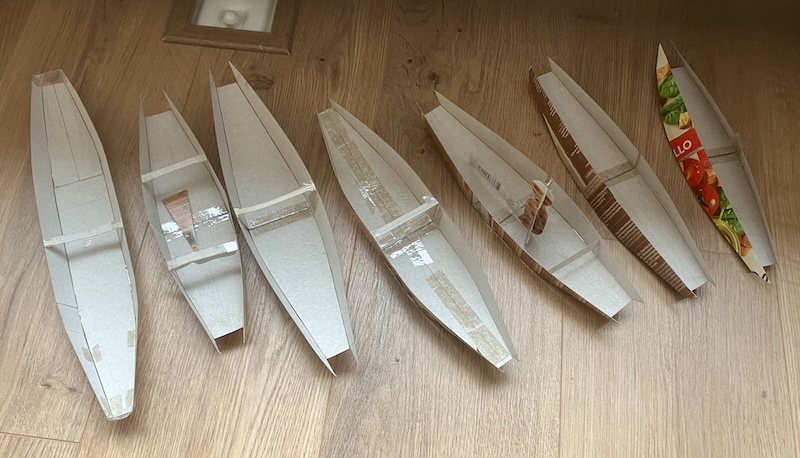
I started playing with the one sheet boat design to see if I could simplify the panel layout (basically - get rid of the lengthwise scarphs). Inspired by flomo I started building a fleet of little models - all iterating on the concept. I circled in on a design with a fold in the middle (like the KWIKY), making it easier to carry through a stairwell and fit in a car. Keeping the panels to 1.5m seemed about right, giving an overall length of about 3m.
About 10 models later I realised the tweaks I was making were really so minor they were not worth agonising over - it was time to start building something.
Construction
A trip to the hardware store got me all the materials. Mainly, a sheet of plywood (which they cut in half lengthwise for me) and some 12x20 hardwood for the gunwales. I also bought some tools, including a japanese style pull saw and a block plane.
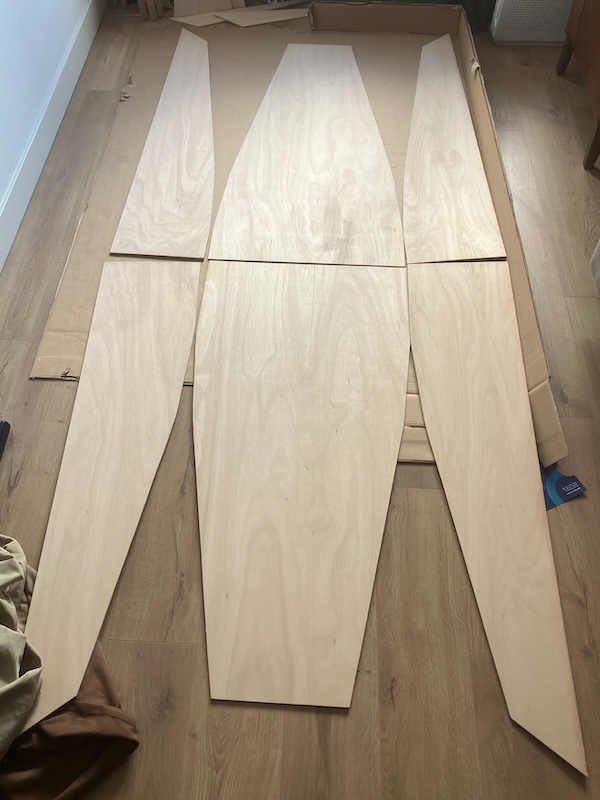
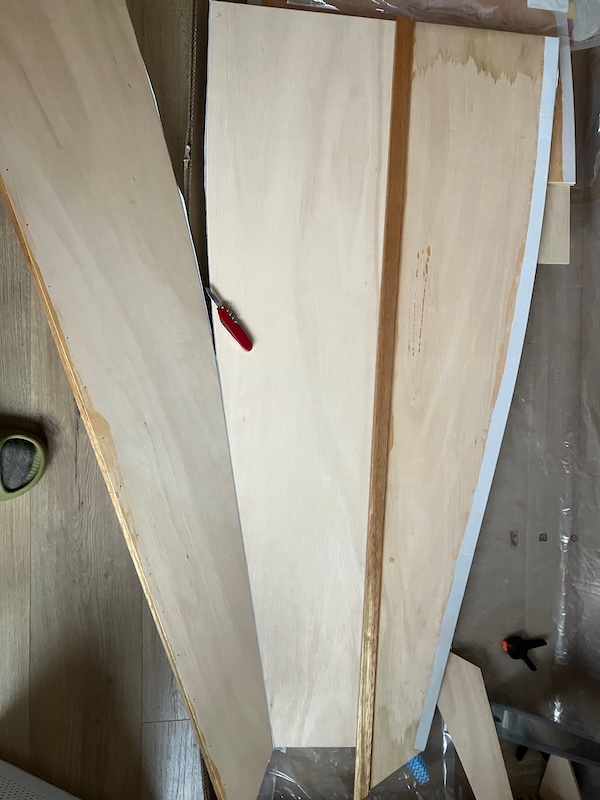
Marking out and cutting the plywood went pretty smoothly. It's incredible how much dust and noise most woodworking activities generate, you really notice in a small space. Especially when it's also your living room! Similar to the designs by Hannu, the layout of the sheet means most cuts are straight lines shared between two panels, minimising waste and also saving time in cutting and marking out.
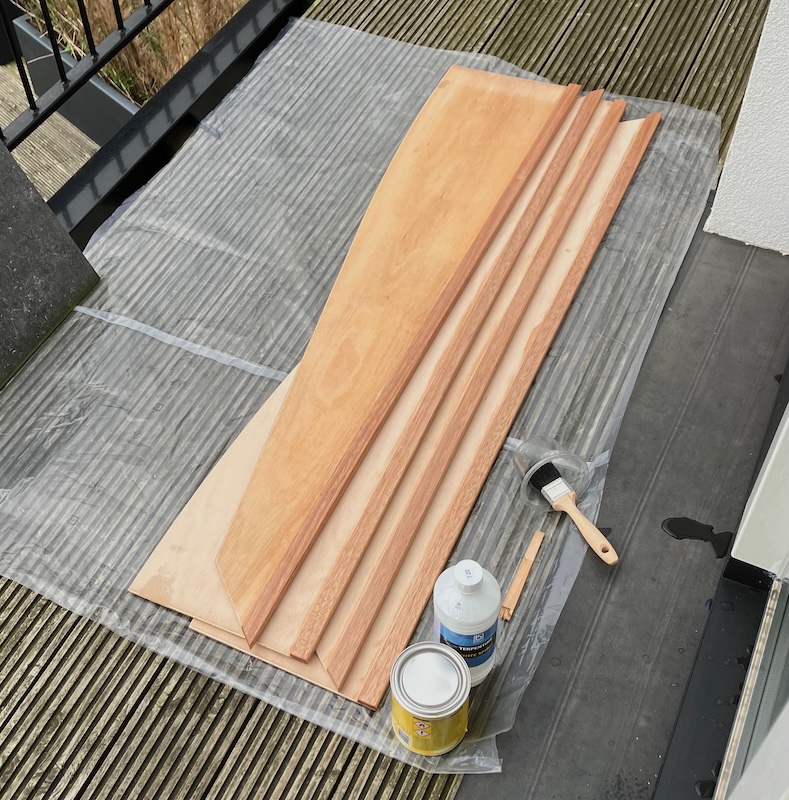
The next step was to shape the curves better. Because of the folding it's important the curves of two adjacent panels are identical, otherwise they won't lay flat on top of eachother. Each side of the bottom was therefore faired with its adjacent side panel to make sure matched.
Once the shapes were right, it was time to do the first (and only, come to think of it...) attaching of boat parts together. The gunwales were attached to the side panels with D3 glue and little brass nails. I like nail construction as it's quick and easy compared to screwing. Unfortunately this again turned out to be a bad idea inside a small room! Very loud. The gunwales were attached oversize and then trimmed to length after drying.
At this point the main pieces were actually complete, and the next step of construction would be to attach them with some sort of watertight hinge. I wanted to use a duct tape hinge, and thought this would work well on a nicely varnished panel. Exactly like the Ken Simpson designs mentioned earlier. Unfortunately, it quickly became clear that marine varnish and turps were not compatible with apartment construction. At all. After hastily transferring to the balcony, and figuring out some rain protection, this seemed like a bad idea. Just the gunwales got a couple more coats of varnish, but another plan of attack was needed for the hinges.
Joining the panels
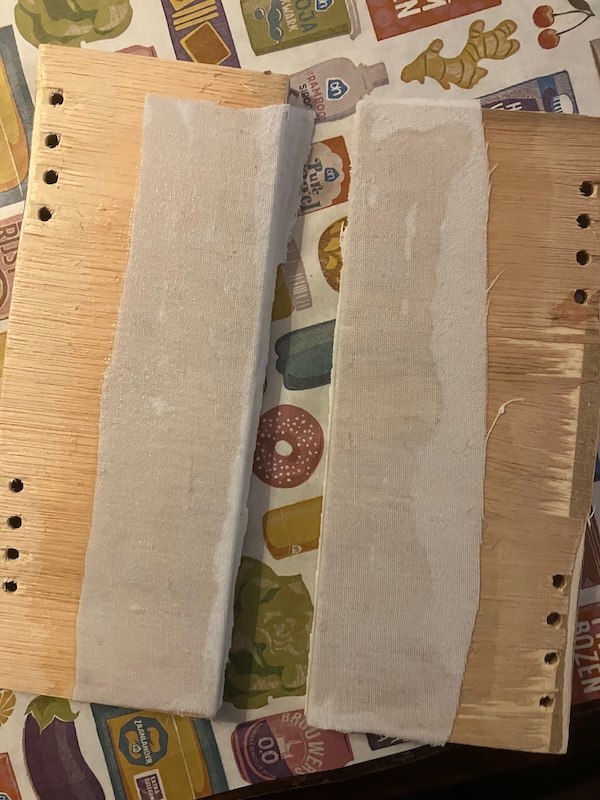
Since the tape thing wasn't going to work out, my next idea was to use an old bed sheet as the hinge. I've seen examples of this sort of construction before, on boats such as the folding kayak. The difference would be using D3 woodglue to attach the canvas, rather than contact cement (since I already had it). I made a test piece of the hinge using some scrap plywood, and it looked very promising, so I forged ahead. This was quite a messy process, but essentially I soaked strips of bed sheet in glue, and then applied it to the boat (in its folded state). A bit stressful but turned out ok.
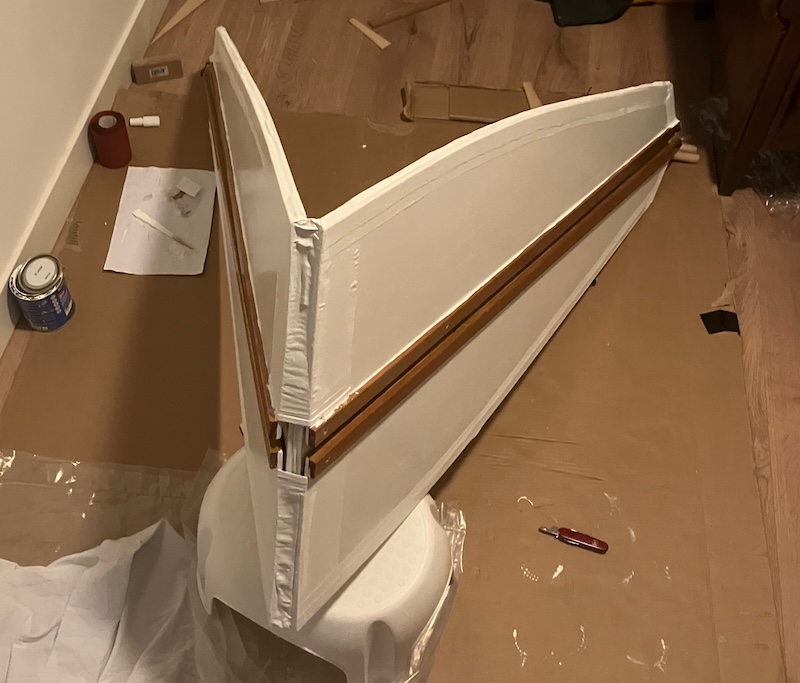
Once the first join had dried, it was time to "unfold" and see if it would work. There were some alarming creeks, and especially at the ends you could tell the join was really being strained. At this point it became clear an enormous amount of force was required to bend the sides of the boat. The 6mm plywood plus gunwale on top is really quite stiff. This kind of thing is tricky to manage on a folding boat, as it's hard to constrain things as well as you can in a normal boat, and all the forces need to be handled internally in a way that can be undone again when the boat folds. I was starting to have some doubts but continued joining the other sides to the bottom panels.
And then... disaster! After some months (yes I'm a slow builder) of playing with the test hinge, it broke. The canvas just ripped. There are a couple of reasons for this I think. Firstly the glue seeping into the canvas makes it stiffer and less flexible. Secondly, the bed sheet is just not very strong. I really couldn't trust this method anymore, especially given how much force everything was under. It was time for plan C. But what was plan C?
Plan C
After some soul searching I decided to take the difficult step of cutting through the already installed canvas on the boat, and trimming it back to the plywood. Too risky to pull off with the glue!
Of course I then turned to the internet again to try to find some solutions. The Handy Andy design uses normal hinges, as well as some neat interlocking wooden parts to take some of the forces and keep things aligned. A very clever system, but not as simple to implement on my multi-fold boat.
The commercially available Seahopper folding boats use cool interlocking chine pieces, and pvc canvas as the watertight seal. Very nice, but fiddly to build and would require buying a bunch more material and tools. The Flapdoodle design uses a similar idea with either hinges or a fishing line figure-eight hinge, see the barquito here.
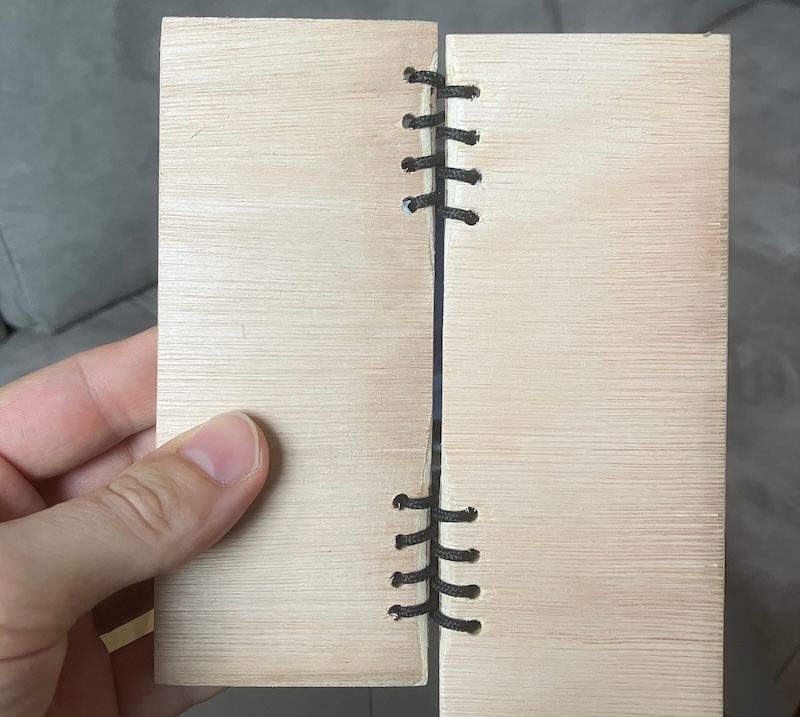
I did a couple of new test pieces. One used store-bought hinges as a structural hinge, with canvas just applied to keep out the water. I also made a version of this which used a figure of eight lashing for the hinge, like that developed by Wharram for his catamaran rudders. I was actually super impressed with the rope hinges, but unfortunately the fabric tended to kind of get pinched in them. I had a few ideas to fix this, for example essentially making “hinges” out of little plywood squares with the rope lashings, and applying those. But this would make the folded package thicker and also be a lot more work. So in the interest of “getting shit done” I went and bought like 30 hinges.
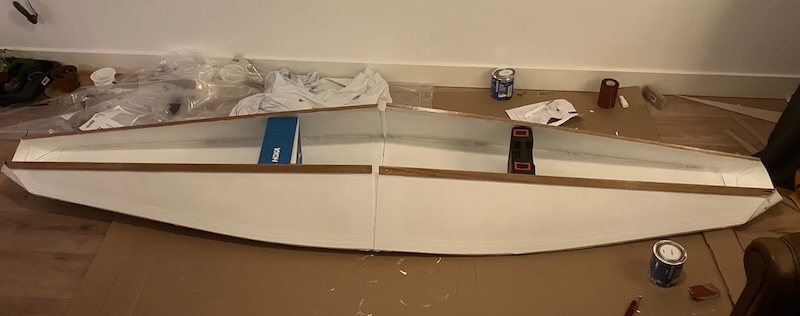
Attaching the hinges was still a little challenging, as you need to partially unfold the panels to get to the screws, and the whole thing is under a lot of tension. But I got things aligned and attached to my satisfaction. I added some string cross bracing at the bow and stern to keep them square and at the right distance, and temporary bracing to finally see the shape of the boat.
The last connections
So far I never did figure out how to finalise the other boat connections. Something needs to stop the boat from folding in on itself, and also something needs to keep the gunwales on the two halves connected and in line. I'd been thinking of different solutions to this for quite a while now, and finally turned to a lesson learnt from my outrigger canoe - lashings!
Essentially the two parts of the gunwale need to be kept together and in line with eachother, like a splint for a broken bone. I slightly flattened a hardwood dowel and tapered the ends down. Lashings near the middle keep it in place, and another lashing tightens them up and holds the halves of the boat together. This system was a bit of an accident after experimenting, but works OK.
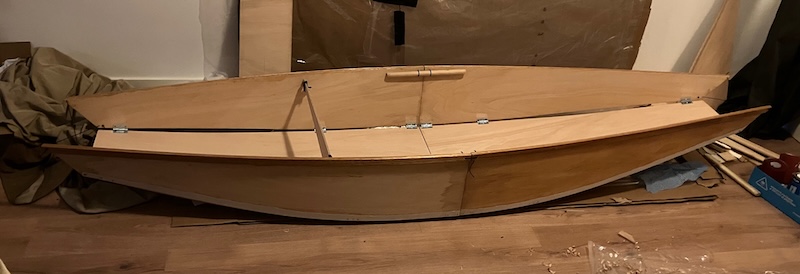
Finally, a single dowel is used as a cross brace to hold the boat open. The ends are mortised into slots in the sides of the boat, and the desperate struggle of the boat to fold itself closed again keeps it in there!
Final touches
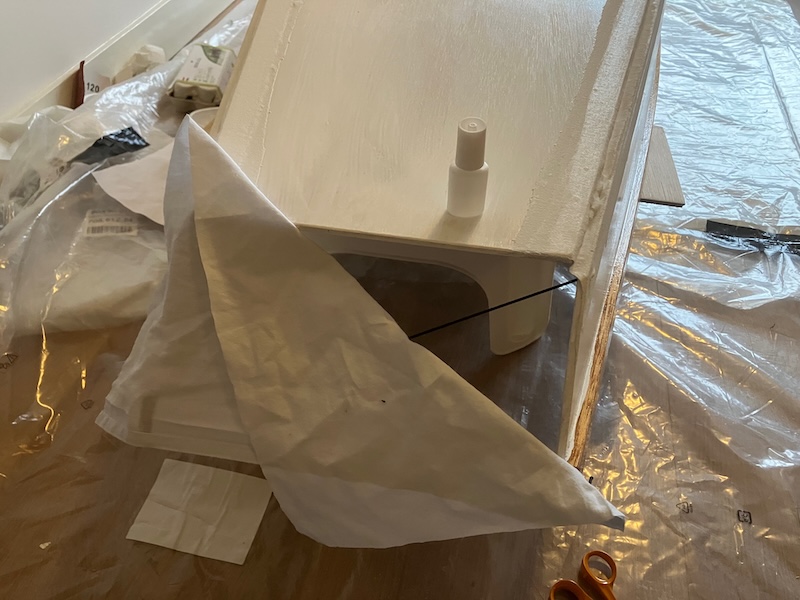
Finding suitable latex paint was a whole mission in itself. Apparently here in the Netherlands it’s very rare to use water based paints outside. I did track some down, but unfortunately not very good quality, and only in white.
At the bow and stern, the "transom" was also put in place. A piece of the same bedsheet. Again paint will make this watertight (plus they are above the waterline). Since the strings are behind it, they are not really under any stress.
I managed to find a wooden two-piece paddle in a second-hand store several months earlier, so with that, everything was ready for the launch. Well, except it was now winter…
To be continue in part two - the launch.
Extra details
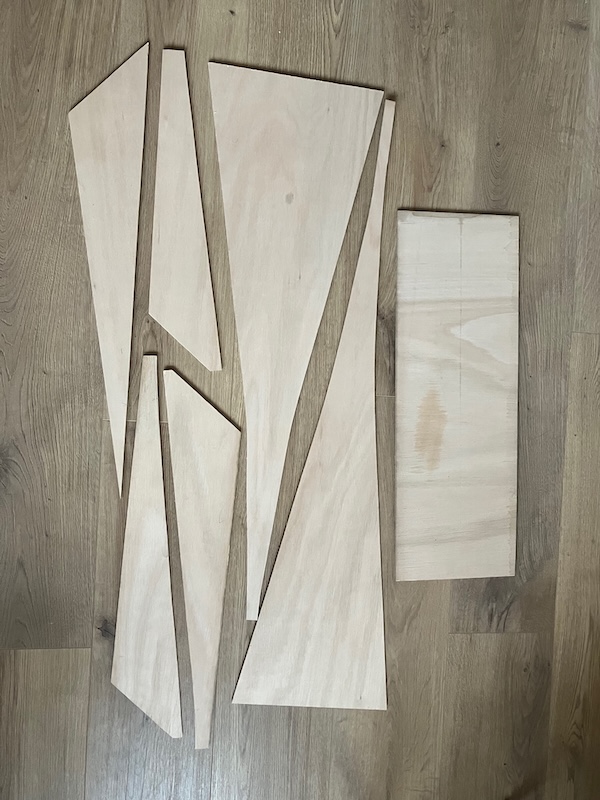
Here's a fun detail, this is all the scrap ply left from the build. There is enough here to make two paddle blades, a bow and stern transom and some knees. This design could therefore be built as a non-folding one sheet boat as well, with a paddle to spare!
And here is a list of the tools used
- Electric drill
- Japanese pull saw
- Block plane
- Knife
- File
- Sandpaper & block
- Tiny hammer
- Screwdriver
Total cost so far has been about 220 euros in material.
Written on 21 April 2025